How to Get Started with Webflow
Webflow is a cloud-based SaaS platform designed for building websites and online stores. Its low-code/no-code visual design tools enable designers to create fully customized websites without needing advanced coding skills. This makes the process faster and more efficient while allowing businesses to showcase their brand with precision and professionalism.
Whether you’re launching a blog, business website, or eCommerce store (you can even sell courses), Webflow offers a versatile solution to meet the demands of modern businesses. If you're planning a website in 2024 or 2025, Webflow is a powerful and dependable tool worth considering. HERE you can see why Digi2 selected Webflow as a central platform for their services.
Before diving into Webflow's main features, it’s essential to know the basics. We’ve already covered how long it takes to learn Webflow and shared tips for beginners and advanced users in our How to Learn Webflow Quickly guide. If you're looking for practical steps and advice to get you started faster, make sure to check it out!
The Webflow's Designer:
The Designer is where you’ll spend most of your time when building a website. It gives you a full range of tools to create a visually stunning and responsive website, all without needing to write code.
How to Access the Designer
To start designing:
- Log in to your Webflow account.
- Choose your project from the dashboard.
- Click “Open Designer” to launch the design interface.
Once inside the Designer, you'll find tools to build your website visually.
Elements in the Designer
Here’s a breakdown of the key elements you’ll work within the Designer:
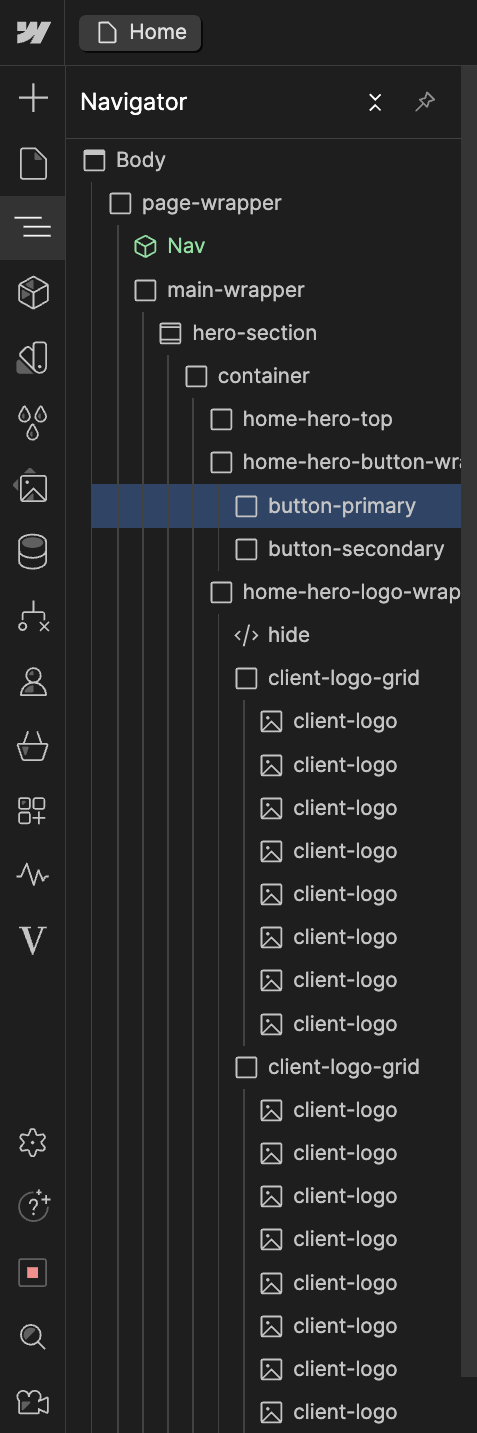
1. Navigator
This shows the structure of your page. You can view, select, and rearrange the hierarchy of elements on your page. Think of it as the map of your website’s layout.
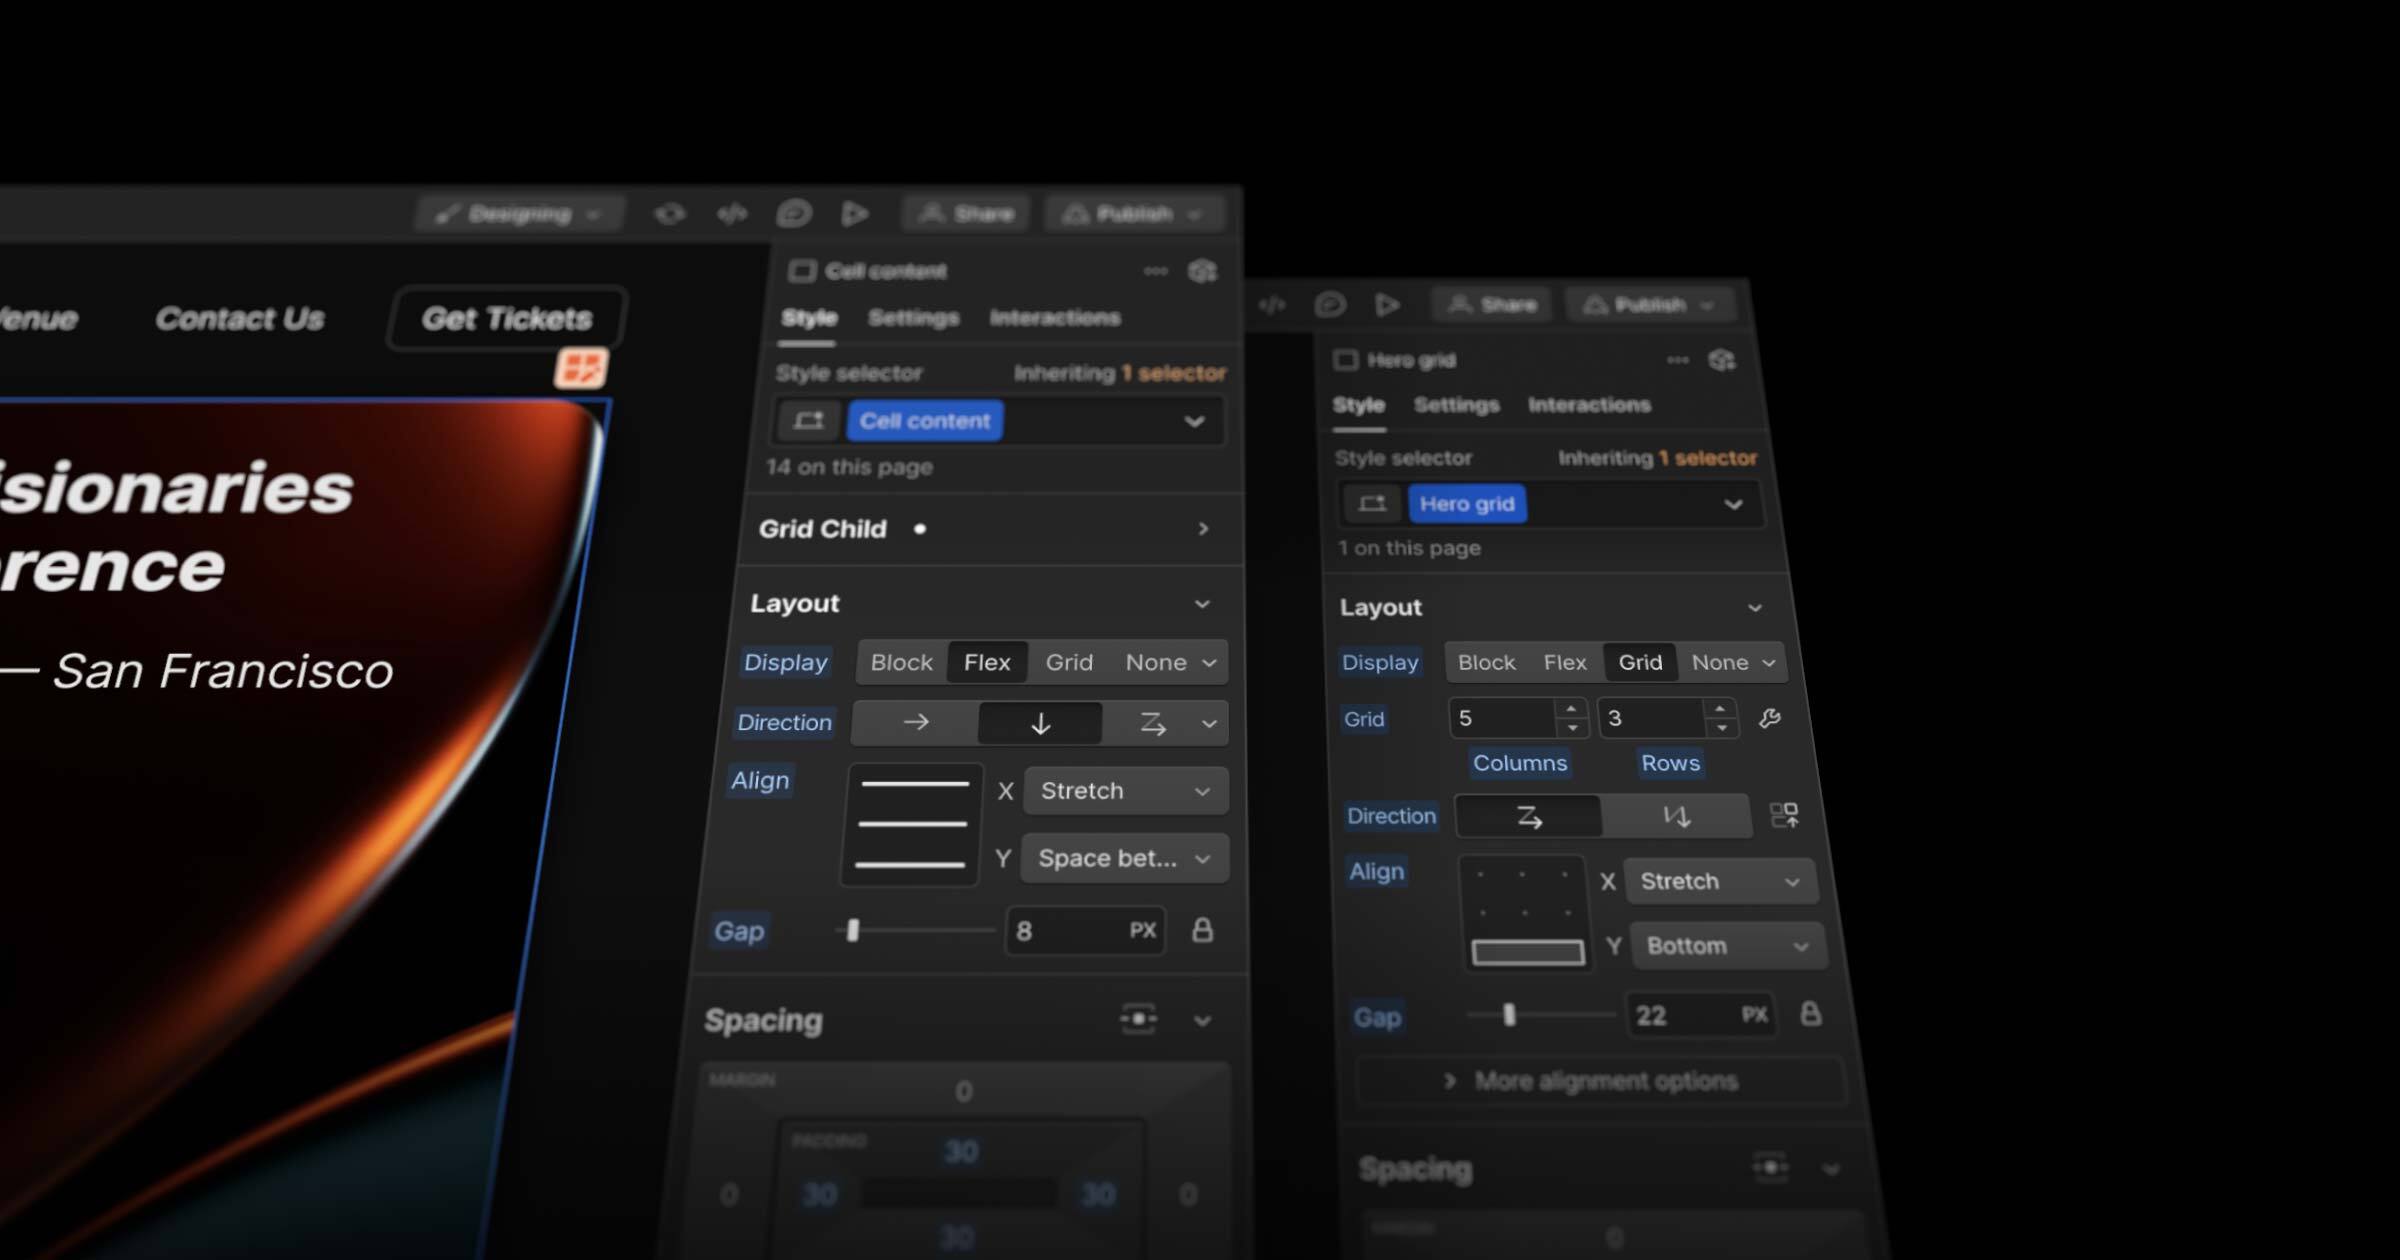
2. Style Panel
The Style Panel is where you refine the appearance of the elements you’ve added. It’s broken down into several sections:
- Typography: Control font size, line height, letter spacing, and color.
- Layout: Adjust the box model, including margins, padding, and positioning.
- Backgrounds: Apply solid colors, gradients, or images.
- Borders & Shadows: Add borders, rounded corners, or shadows to give your elements depth.

3. Components Panel
The Components Panel provides reusable and ready-made elements, allowing you to create consistent designs across your site. Here’s what you’ll find:
- Components: These are groups of elements that you can save and reuse throughout your site. For example, if you create a custom header or footer, you can save it as a component and add it to multiple pages. Any changes to a component will automatically update across all instances, ensuring consistency.
- Navbar: Pre-designed navigation bars that are responsive out of the box. You can fully customize them to fit your branding and layout.
- Slider: Add a dynamic image or content slider to your page. It’s perfect for galleries or featured sections.
- Tabs: Use tabs to create content sections that users can switch between without reloading the page, ideal for showcasing product details.
- Lightbox: Perfect for displaying large images or videos, lightboxes allow users to click on a thumbnail to view content in an overlay.
- Background Video: Add visual interest to your pages with background videos, making your design more dynamic.
4. Responsive Design Tools
At the top of the Designer, you’ll see options for responsive views. This allows you to toggle between device breakpoints (desktop, tablet, and mobile) to adjust how your design looks across different screen sizes. You can make specific design changes for each breakpoint to ensure your site looks great on any device.

5. Interactions Panel
Webflow’s Interactions Panel lets you add animations and interactions to your site. This is where you can create effects like fade-ins, hover animations, or complex scroll-based interactions to make your site more engaging.
- Page Load Animations: Trigger animations when the page loads or a specific element becomes visible.
- Element Trigger Animations: Trigger effects based on user interaction, such as hovering over a button or clicking on a link.
6. Assets Panel
This is where you manage all the media for your website, including images, videos, and other files. The Assets Panel lets you upload, organize, and reuse media files throughout your project. You can also connect external URLs for background images or videos.
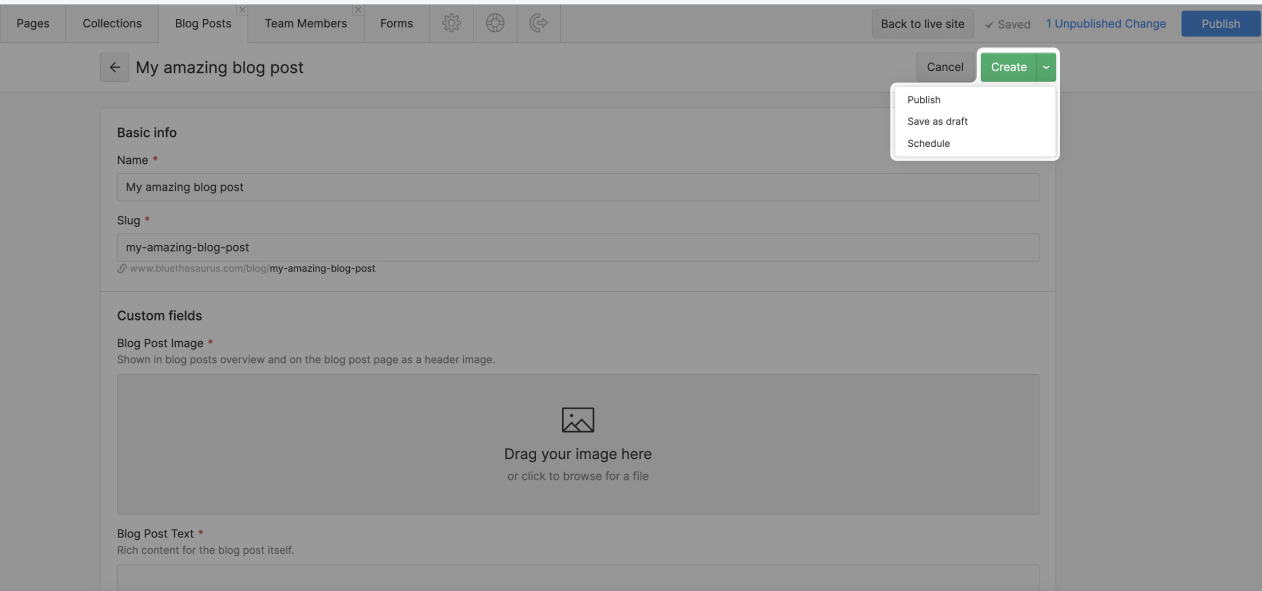
7. CMS (Content Management System)
The CMS Panel is where you manage dynamic content such as blog posts, products, or events. Collections let you define the structure of your content (title, image, description) and populate your site with automatically generated content from the CMS.
Remember – Webflow's Designer isn’t accessible on mobile devices, so you’ll need to work on a desktop or laptop. You can also learn about other Webflow limitations in THIS ARTICLE.
Sections You Can Use in Your Webflow Project
When you're building a site in Webflow, you have access to various element categories, each designed to handle different aspects of your site. Below, we'll walk through what each section offers and how you can use them to enhance your project.
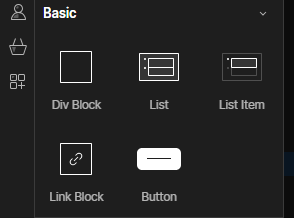
1. Basic Elements
These are the essential building blocks of your website. You’ll use these elements in almost every Webflow project.
- Div Block: A versatile container for grouping and styling content.
- Text Block: Displays a single block of text.
- Link Block: Turns any block-level element (like an image or div) into a clickable link.
- Button: Creates clickable buttons for user interaction.
- Image: Inserts images into your project with customizable alt text.
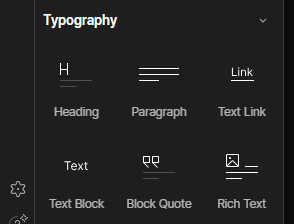
2. Typography
Webflow offers a range of typography options to style and present text content on your site.
- Heading: Use headings (H1 to H6) to structure the content hierarchy on your site.
- Paragraph: A block of text styled as a paragraph.
- Text Link: Inline text that users can click to navigate to another page or section.
- Rich Text: Perfect for creating blog posts or dynamic CMS content, allowing you to combine multiple text styles (e.g., headers, lists, and links) in one block.
3. Forms
Forms are crucial for gathering information from your users, whether through contact forms, surveys, or subscriptions.
- Form Block: A wrapper for form fields, buttons, and labels.
- Input Field: Use this for gathering user input, such as names or email addresses.
- Textarea: Allows users to enter larger blocks of text, ideal for comments or feedback.
- Checkbox: Lets users select options in a list.
- Dropdown: Displays a list of predefined options for users to select from.
- Submit Button: A button that submits the form data to your configured endpoint.

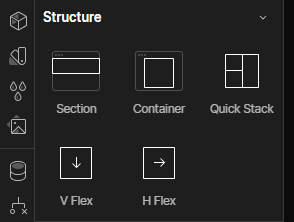
4. Structure
Elements in this category help you define the structure of your pages. They make it easier to create layouts that are organized and responsive.
- Section: A full-width container, used to break your page into different sections.
- Container: A fixed-width container that keeps content within defined boundaries, ensuring readability.
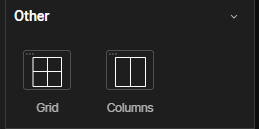
- Grid: A flexible layout system that allows for the creation of responsive, multi-column layouts.
- Columns: Easily divide your content into two or more columns.
5. Layouts
Pre-designed layouts allow you to quickly add common website sections without starting from scratch. Webflow provides you with templates that you can fully customize.
- Navigation Bars: Ready-to-use, fully responsive navigation bars.
- Footers: Pre-styled footers for displaying contact information, social links, and other site essentials.
- Hero Sections: Large, eye-catching sections ideal for introductions or key site messages.
- Content Blocks: Pre-designed sections for showcasing products, services, or blog posts.
6. CMS (Content Management System)
The CMS lets you manage dynamic content like blog posts, portfolios, or product listings. These elements help you display this dynamic content on your website.
- Collection List: Displays a set of items from a CMS Collection (like blog posts or products) with customizable layouts.
- Collection Item: An individual item from a CMS Collection.
7. Ecommerce
If you’re building an online store, Webflow’s Ecommerce elements let you add and manage products directly on your website.
- Product List: Displays products dynamically from your Ecommerce Collections.
- Add to Cart: Lets users add products to their shopping cart.
- Cart: Displays the cart summary and allows users to proceed to checkout.
- Checkout Form: Collects the user’s payment and shipping information for a purchase.
8. Advanced Elements
These elements add interactivity and dynamic content to your site, going beyond basic design.
- Embed: Add custom code or third-party widgets (like YouTube videos or social media posts).
- Lottie Animation: Integrate lightweight animations that bring your design to life.
- Rive: Added in September 2024, lets you integrate advanced animations into Webflow with smaller file sizes and faster load times – click here to read more.
- HTML Embed: Use this block to insert custom HTML, CSS, or JavaScript into your project.
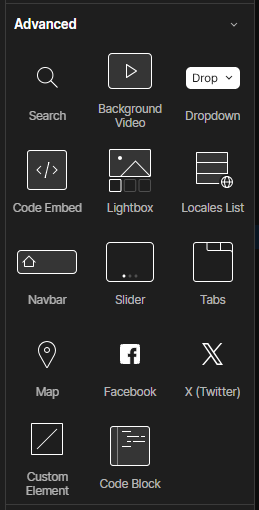
9. Other
Webflow provides additional elements that offer specialized functionality.
- Video: Embeds a video hosted on platforms like YouTube or Vimeo.
- Map: Adds an interactive map using Google Maps.
- Social Icons: Displays social media icons that link to your social profiles.
The Webflow's Editor:
After you’ve designed your website, the Editor is where you’ll manage your content without touching the design. It’s ideal for ongoing updates and allows non-designers to easily change text, images, and more.
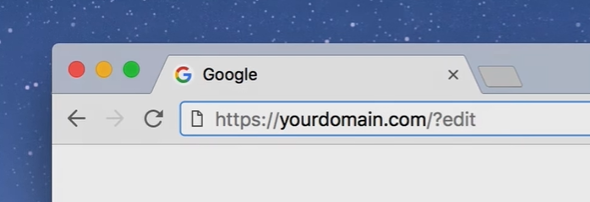
To access it, follow these steps:
- Publish your website from the Designer.
- Visit your site by typing your domain into your browser.
- Add ?edit to the URL (e.g., yourdomain.com/?edit) and hit Enter.
- Log in using your Webflow account credentials, and you'll be taken to the Editor.
Editor Toolbar Elements
Once logged in, you'll see the Editor Toolbar at the bottom of the screen. Here’s what each element does:
1. Pages
Navigate between different pages on your site to edit content. You can select the page you want to work on and make content updates without affecting the design.
2. Collections
If your site uses dynamic content (like blog posts or product pages), click Collections to add, edit, or remove items. This is great for regularly updated content.
3. Elements Panel
You can quickly update static content such as text, images, and links directly from the live page. Simply click on the element you want to edit, make the change, and hit save.
4. Forms
Manage your website’s forms by viewing form submissions and adjusting the connected email or CRM for responses.
5. SEO Settings
Edit the SEO fields like meta descriptions and Open Graph settings for social sharing. This ensures your site is search engine optimized without needing a developer.
6. Publish
Once you’ve made your content updates, click the Publish button to push the changes live to your website.
A tip from us: Remember, when using the Editor, to have only this one page from Webflow open – otherwise all your work on an article or other thing may go to waste. Yes, been there, done that... ;)
The Settings: Customize Your Site’s Functionality
The Settings area in Webflow gives you control over the technical aspects of your website, from hosting to SEO to integrations.
How to Access the Settings
To access Settings, go to your project dashboard and click the gear icon next to your project’s name.
From here, you can configure the following:
1. General Settings
Adjust your project name, and description, and select a favicon for your website.
2. Hosting Settings
You can configure your hosting by connecting a custom domains (yes, Webflow allows you to add moe than one domain), enabling SSL for security, and viewing your site’s performance metrics.
3. SEO Settings
Webflow automatically generates a sitemap for SEO, but you can customize your meta tags, set up 301 redirects, and fine-tune your page titles and descriptions here.
4. Backups & Restores
Webflow automatically creates backups of your site. If something goes wrong, simply restore a previous version from the Backups tab.
5. Integrations
Easily integrate tools like Google Analytics 4, Make, and HubSpot to enhance your website's functionality. Webflow provides built-in integrations, so no coding is required.