When working on a project, internal traffic — like your team visiting the company website — can skew your GA4 data and make it harder to analyze real user behavior. To ensure accurate reporting, you’ll need to filter out this internal traffic.
But where do you start, you ask? First things first:
- Identify Internal IP Addresses
Determine the IP addresses of your team or office network that you want to exclude. - Document the IPs
Make a list of these IP addresses to ensure you include only the relevant ones in the filter. - Apply the Filter in GA4
Add these IP addresses to your GA4 account under the "Data Settings" section. This will exclude internal traffic from your reports and give you a clearer picture of your audience's activity.
By filtering out internal traffic, you can maintain cleaner, more reliable data for your analytics. Let’s ensure your reports reflect only the behavior of your real audience!
To determine the IP address you want to exclude, you can use the following site: https://ipinfo.io/ where you can check your IP address.
You can also ask an IT person, who will probably have this knowledge and can also give you a list of IP addresses that may be present in your office.
You already have a list of IP addresses to exclude. Saved. Let's move on to action – excluding that IP in GA4.
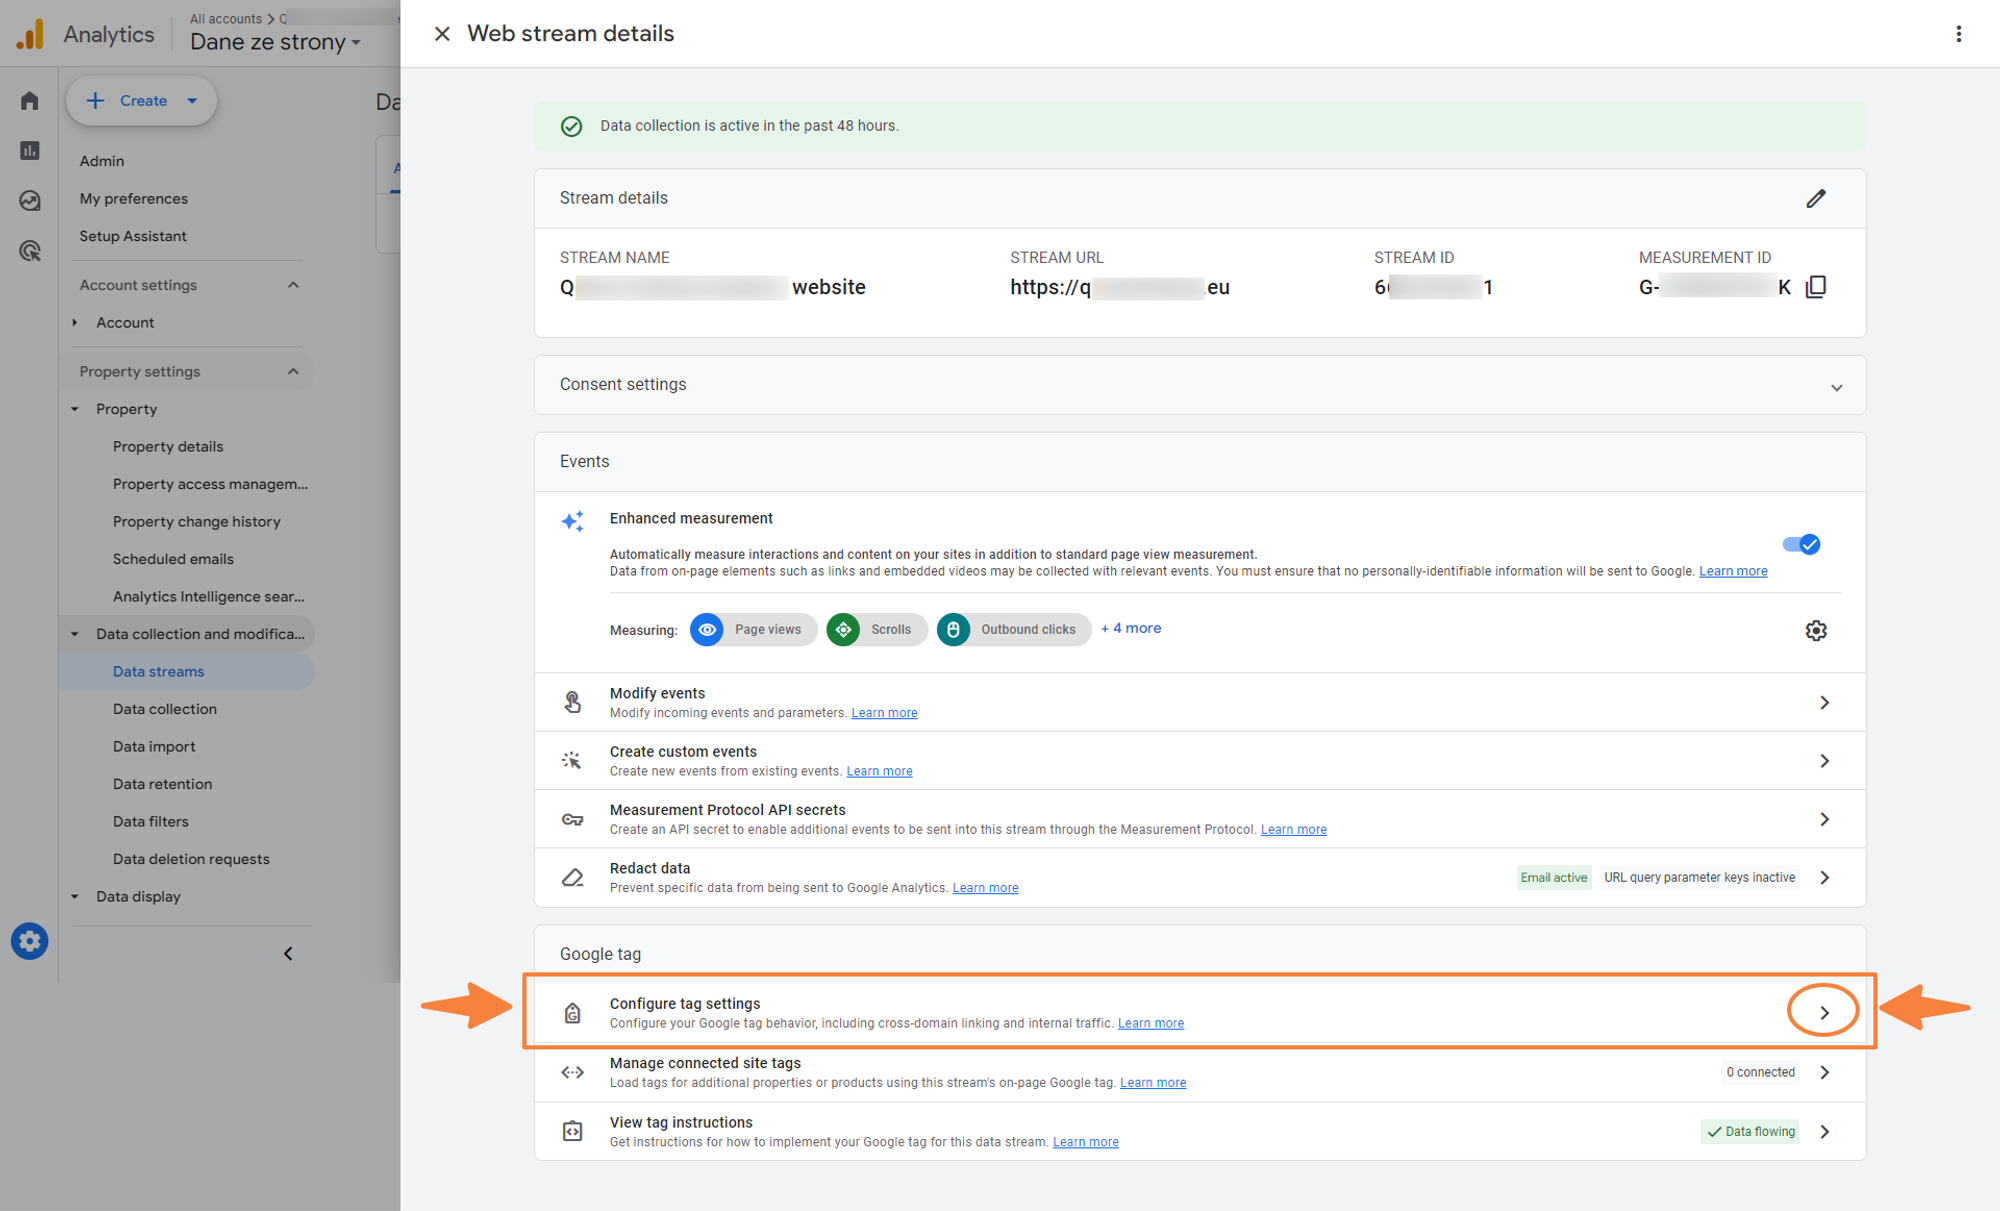
You go to Google Analytics 4 → Admin → Data Streams.
.png)
Select Data Stream:

Click Configure tag settings.

And now Show more.
.png)
Then Define internal traffic.
.png)
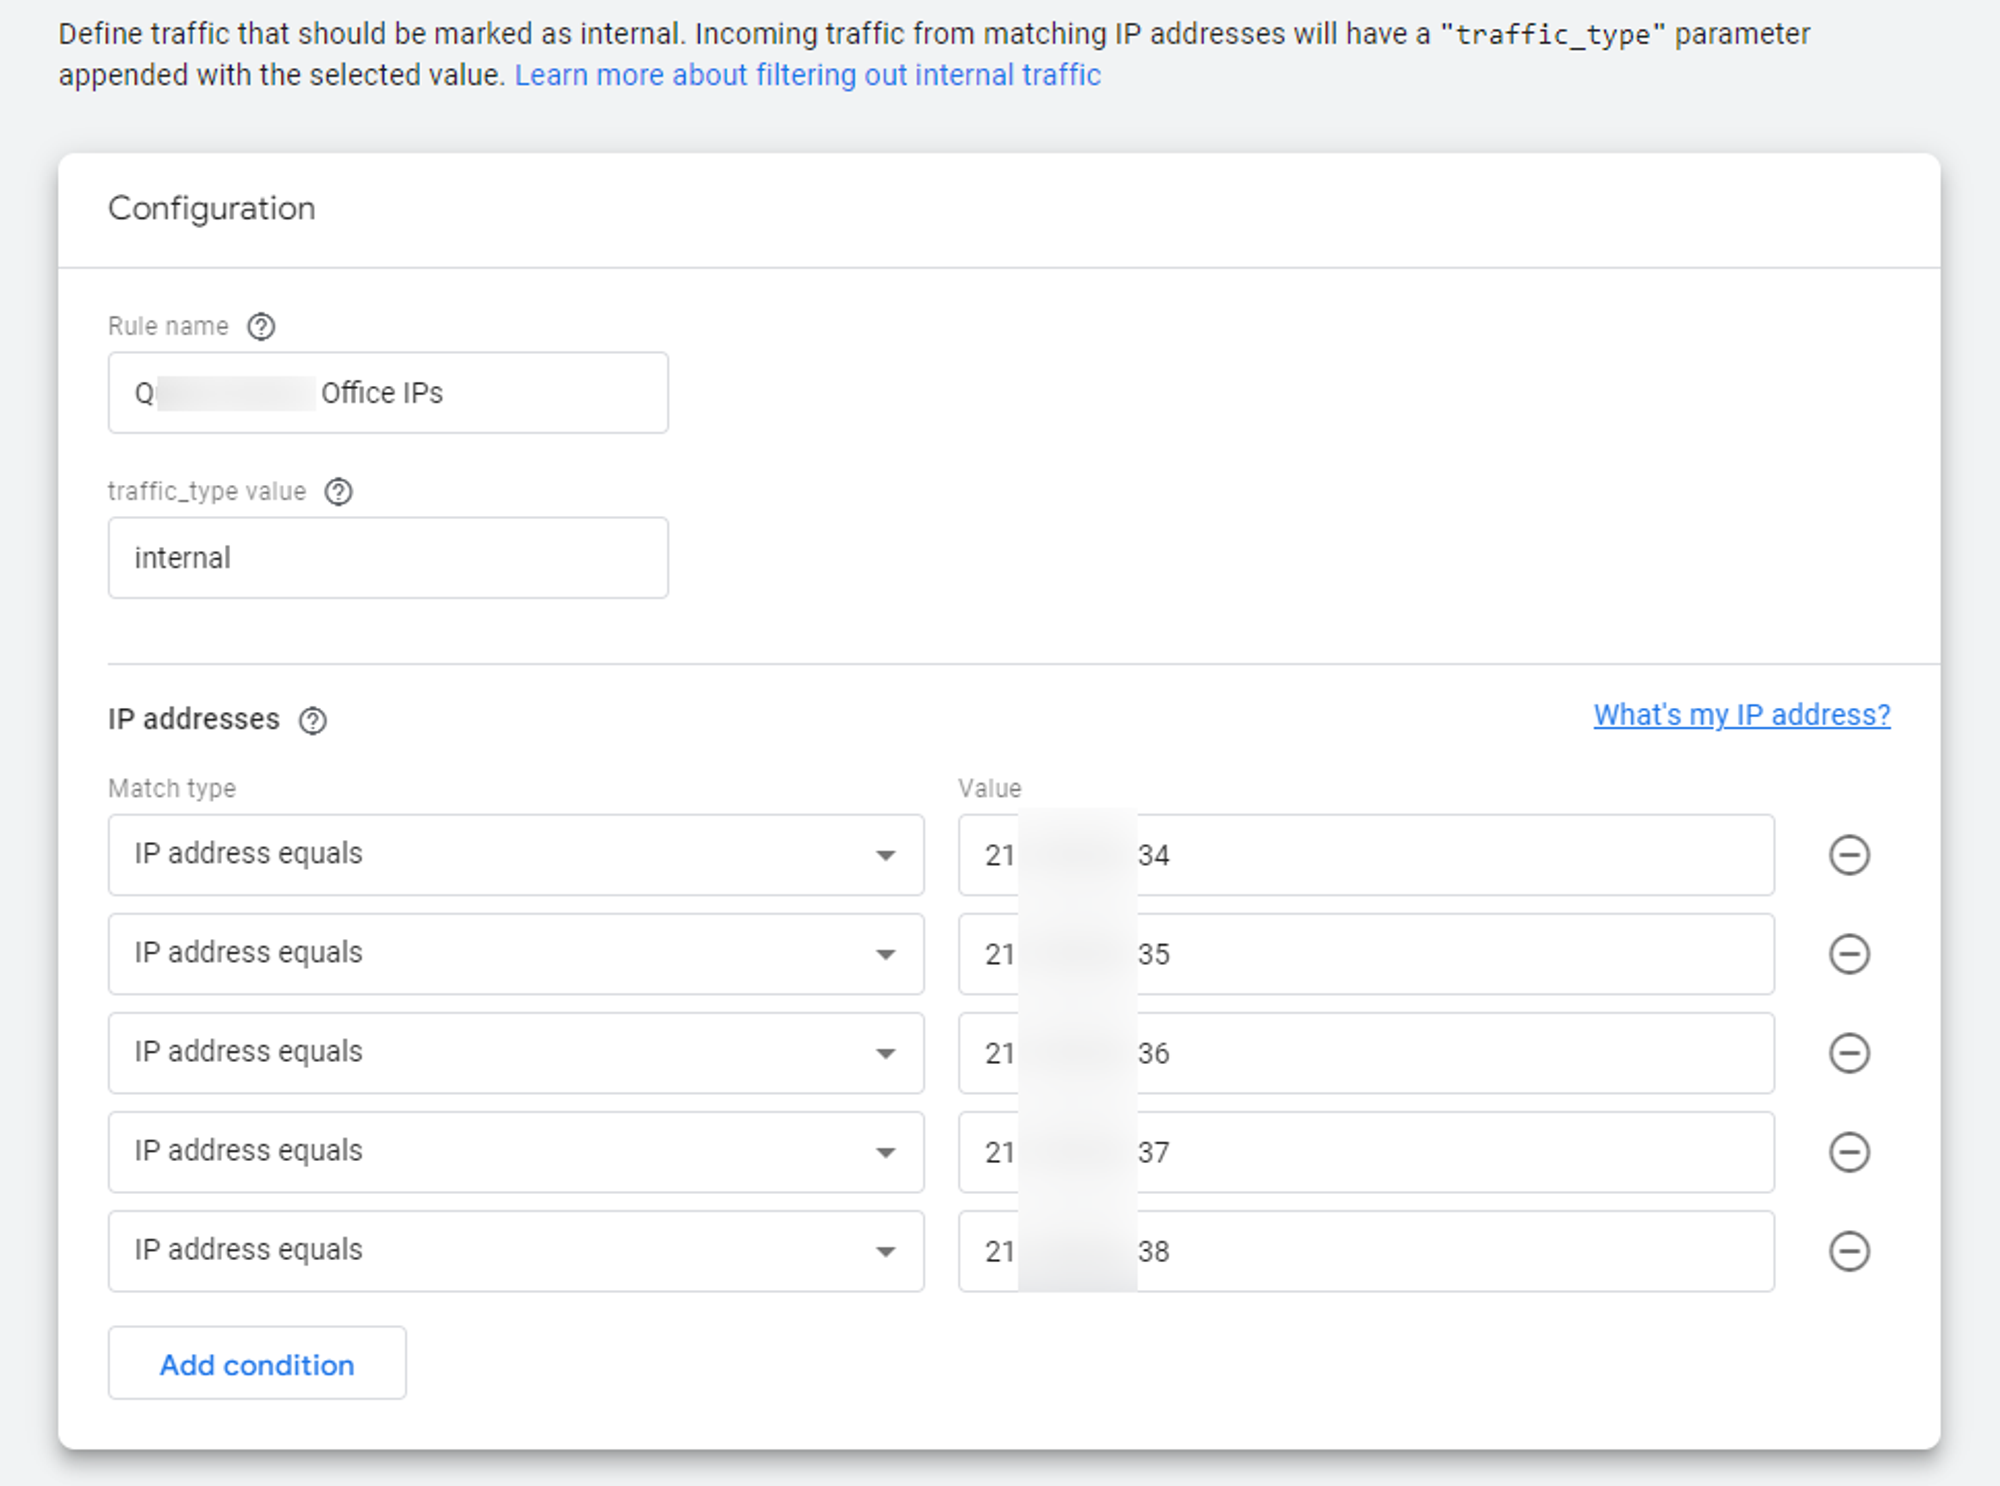
We create a rule.

Rules can be created – for example, if you have more locations, you cancreatea rule for, say, an office in theU.S.,and another rule for an office in Japan.

After creating the rules, we also need to go to Admin → Data filters.
.png)
To activate our filter to exclude internal traffic – that is, from IP addresses that we added in the rules.

All we need to do now is change the filter status from Testing to Active.
.png)
And save it.
.png)
From now on, our internal traffic by IP addresses set in rules will not show up in GA4 reports.


