What are Audiences in GA4?
In GA4, an audience is a group of users defined by certain shared traits or actions. You can think of an audience as a segment of your overall user base, tailored to specific interests or behaviors on your website or app. Audiences can be based on demographics, behaviors, purchasing patterns, engagement levels, etc.
Why are audiences important for reporting & remarketing?
Audiences in GA4 enable you to:
- Target your marketing efforts more precisely, ensuring that each campaign reaches users who are more likely to engage or convert.
- Track the performance of specific user groups in your reports, providing a more in-depth view of how different audiences engage with your content.
- Set up remarketing campaigns to re-engage users who have shown interest but haven’t yet converted, reminding them of your offerings or encouraging them to return.
Ultimately, audiences in GA4 are essential for any data-driven business that wants to connect more meaningfully with its audience, improve ad relevance, and increase return on ad spend (ROAS). Let’s dive into how you can create audiences in GA4 to harness these benefits for your business.
How to create audiences in GA4?
First things first, so:
1. Sign in to your Google Analytics account and in the main panel, click on Admin.
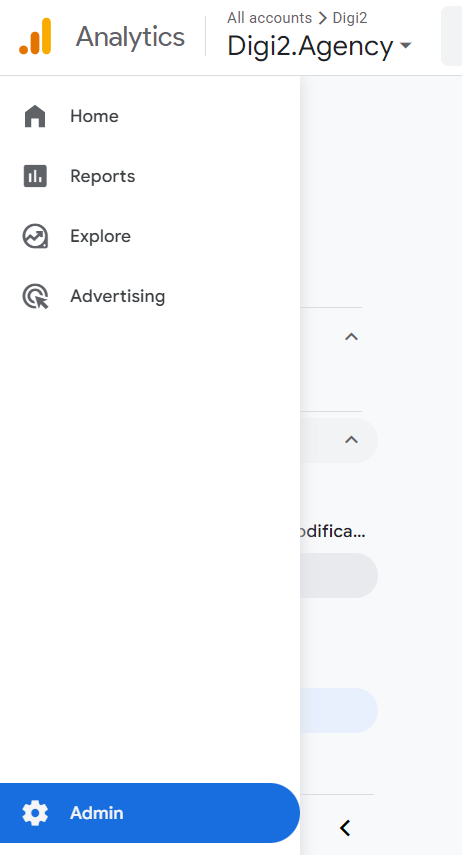
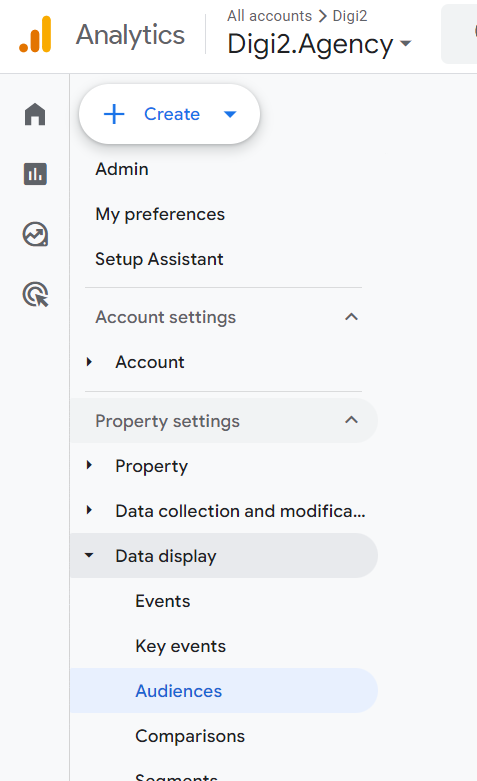
2. Go sequentially from Property settings -> Data display -> up to Audiences.
The Audiences page is where you can view and manage all your audiences, both default and custom.
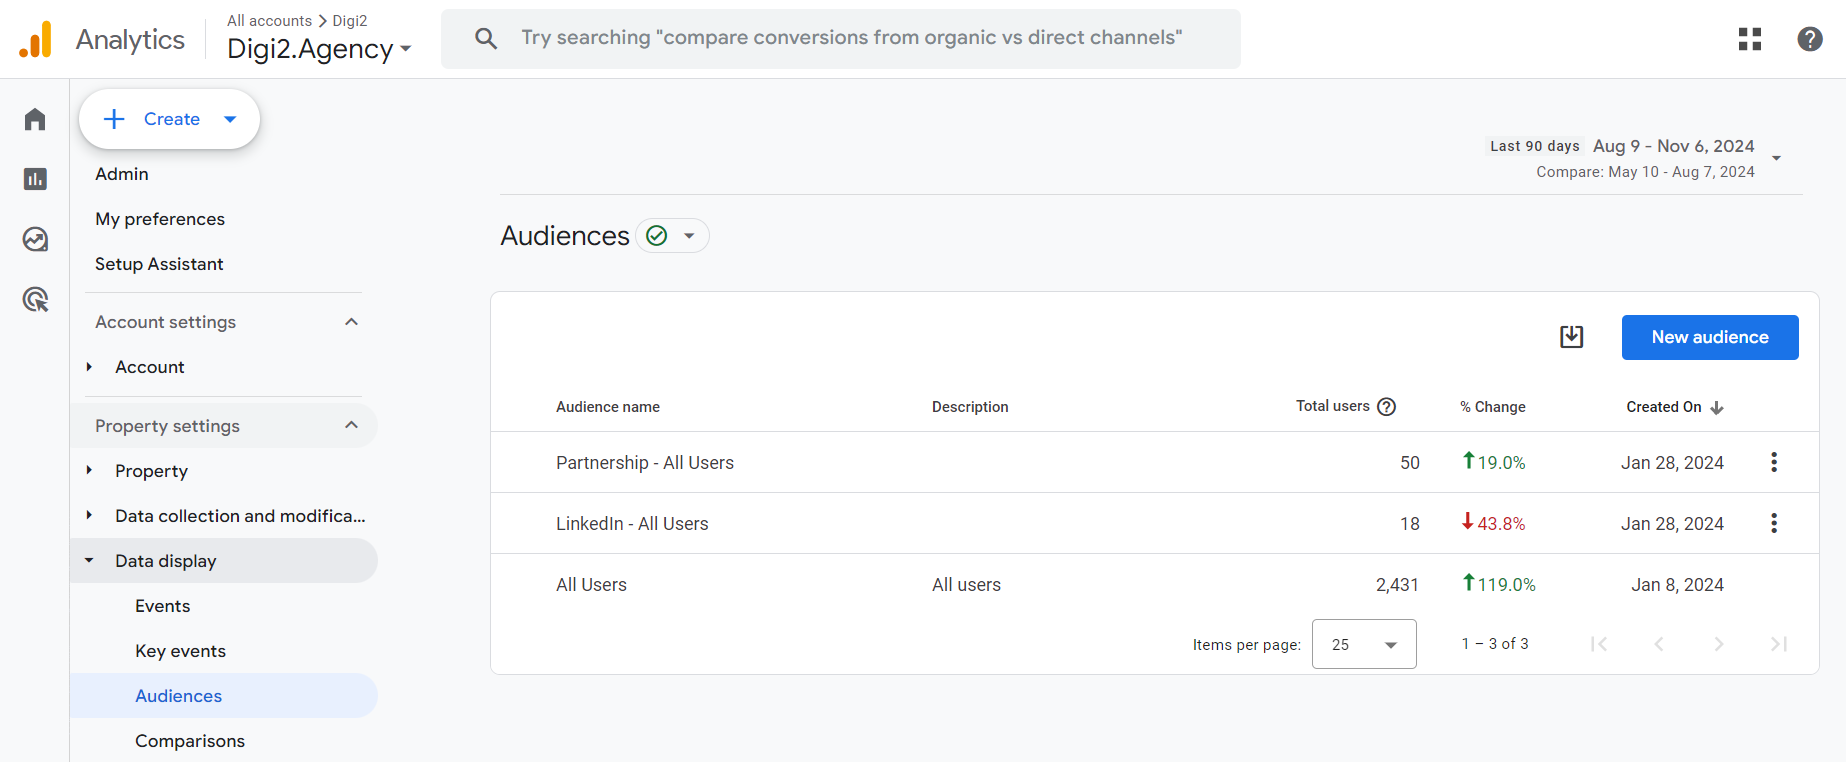
Creating a New Audience
On the Audiences page, follow these steps:
1. Click the New audience button.
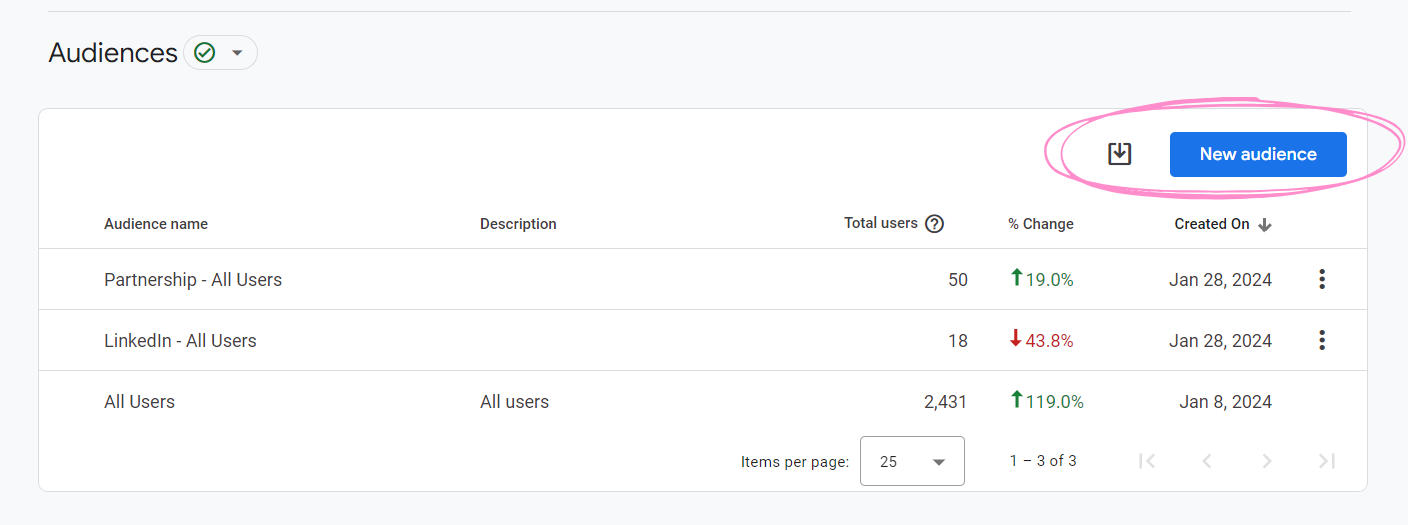
2. Choose Between Custom or Reference Audiences.
When building a new audience, you can either start from scratch or use a reference:
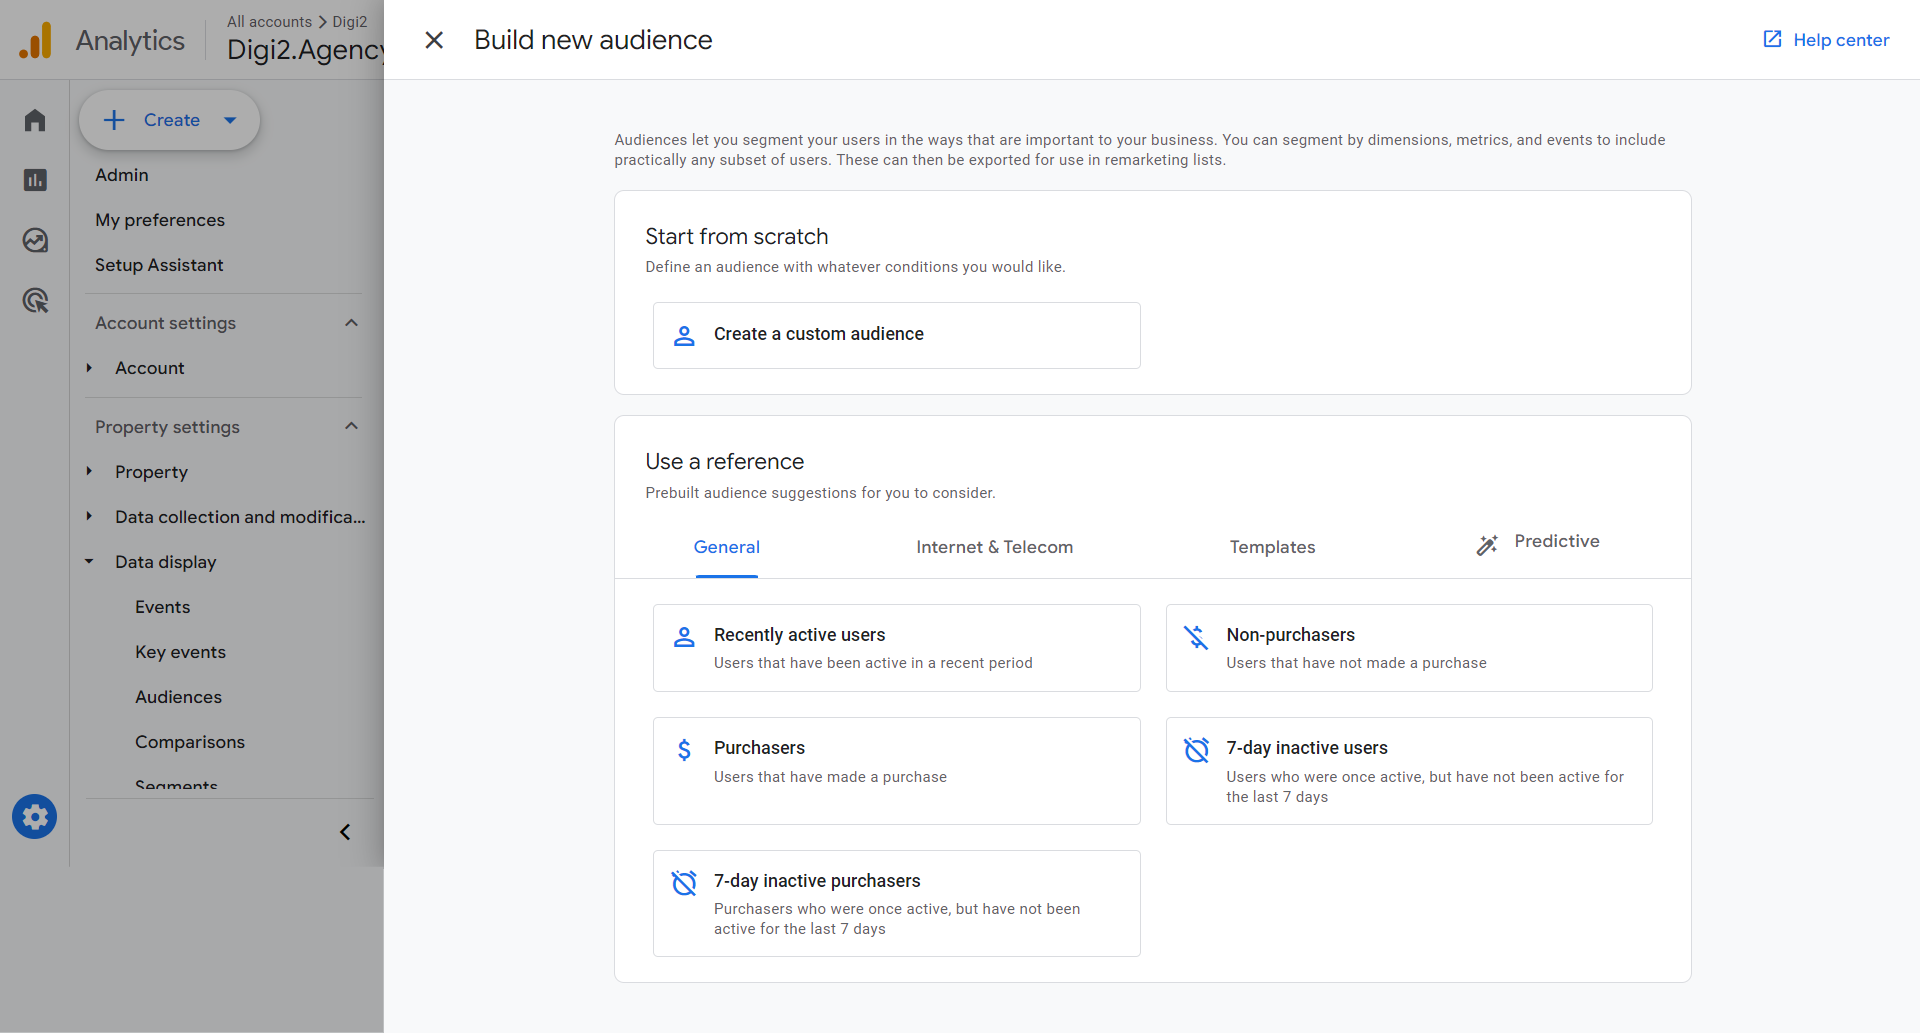
- Create a custom audience: Define an audience with specific conditions that align with your unique business goals.
- Use a reference: Choose from prebuilt audience suggestions under tabs like General (e.g., recently active users, non-purchasers, 7-day inactive users), Templates, Internet & Telecom, or Predictive options for quick setup based on common audience types.
Today we will focus on creating an audience from the very beginning. So click Create a custom audience.
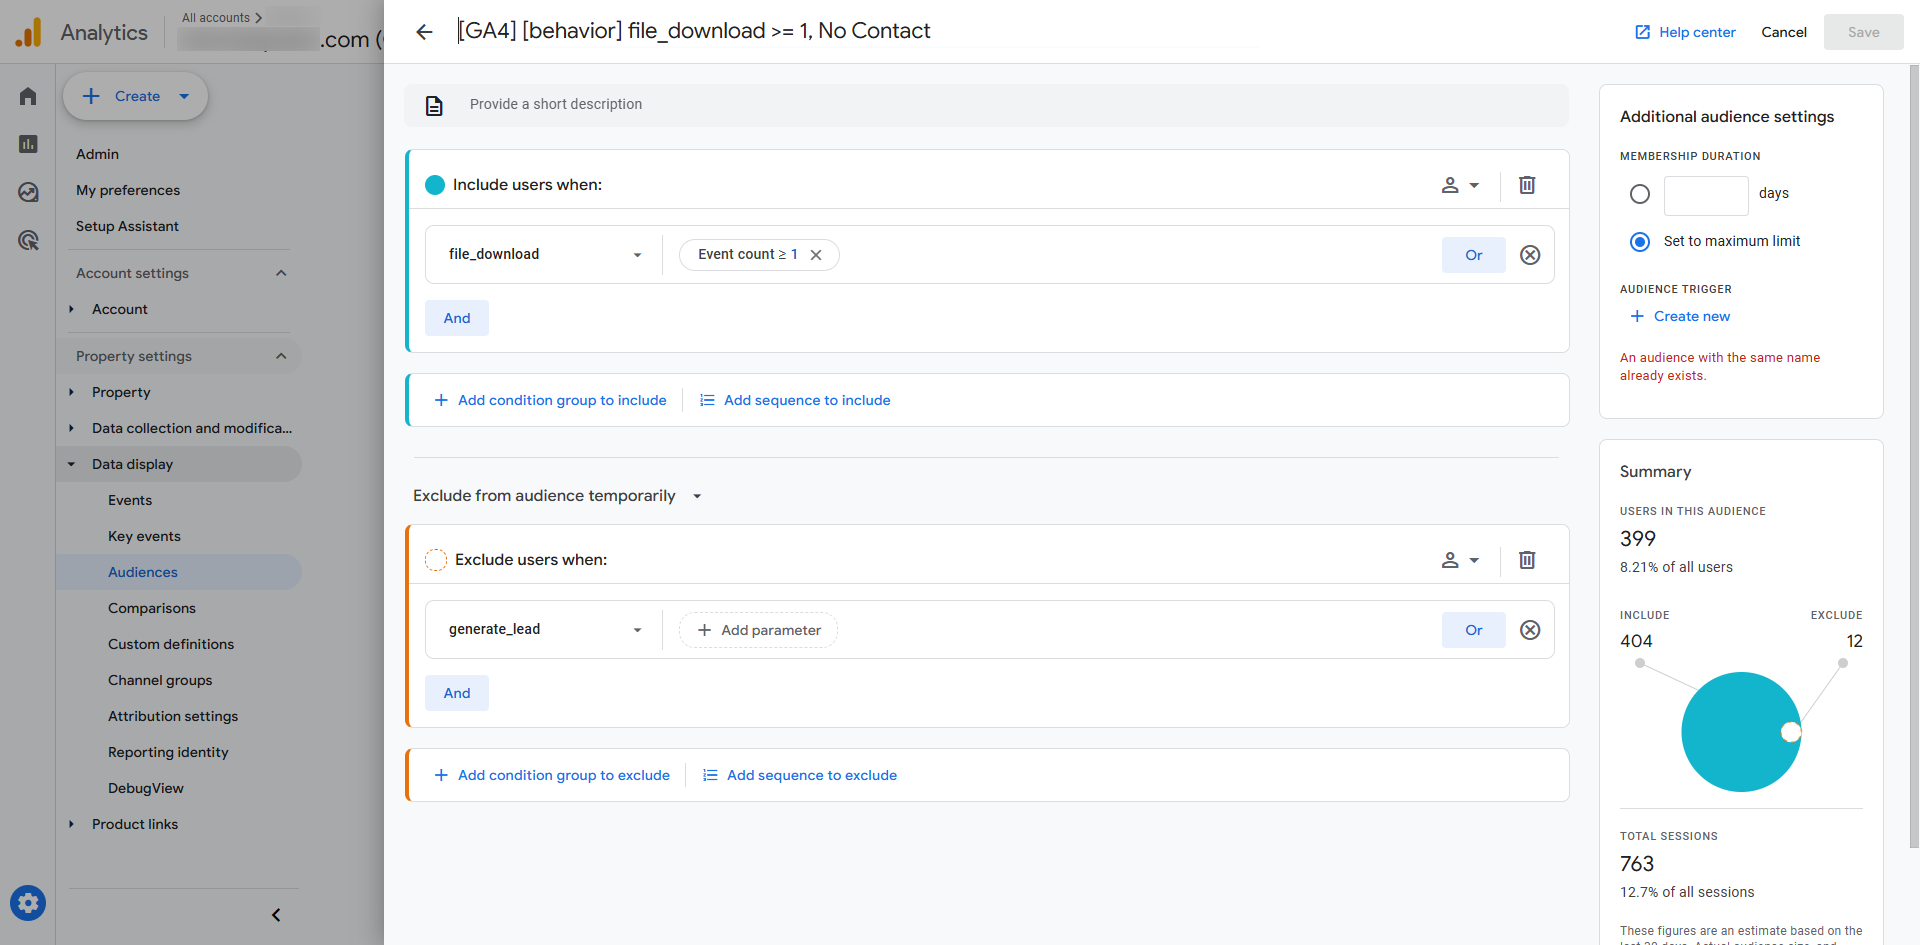
3. Choose Conditions.
You can add multiple conditions here to include users who meet these criteria.
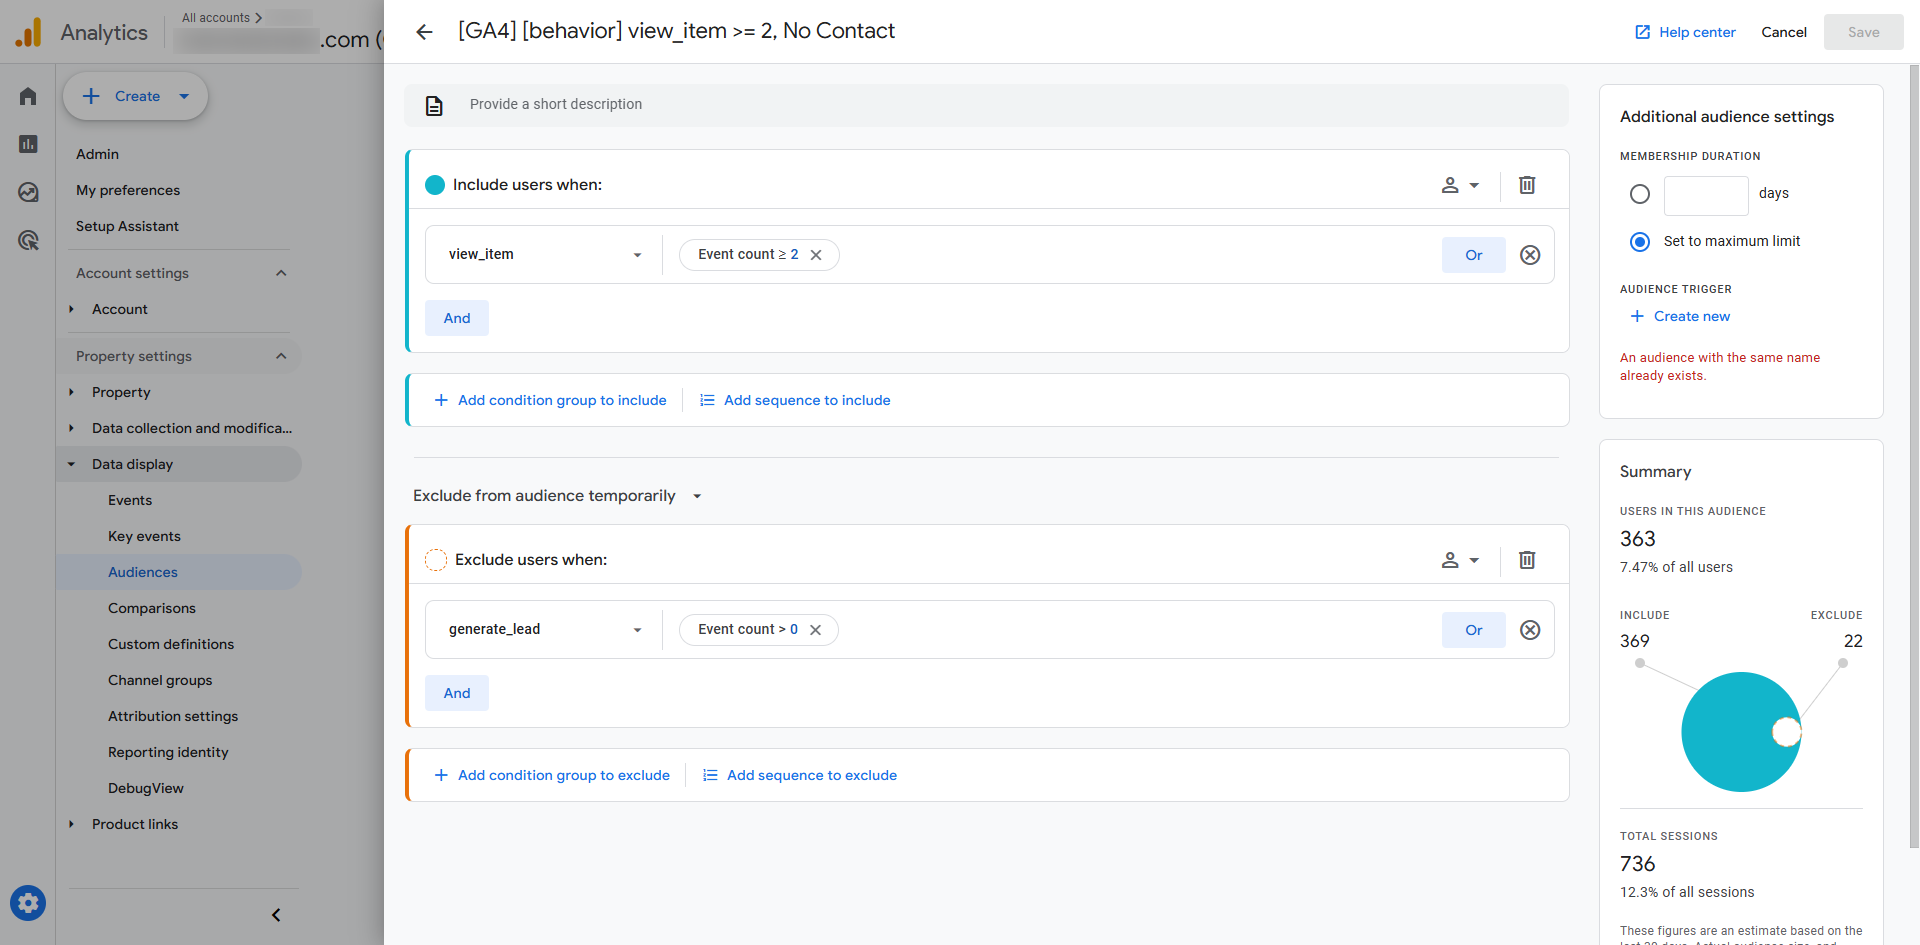
- Include users when: – this is where you set the conditions that define your audience. You’ll need to use “AND” and “OR” operators to combine conditions.
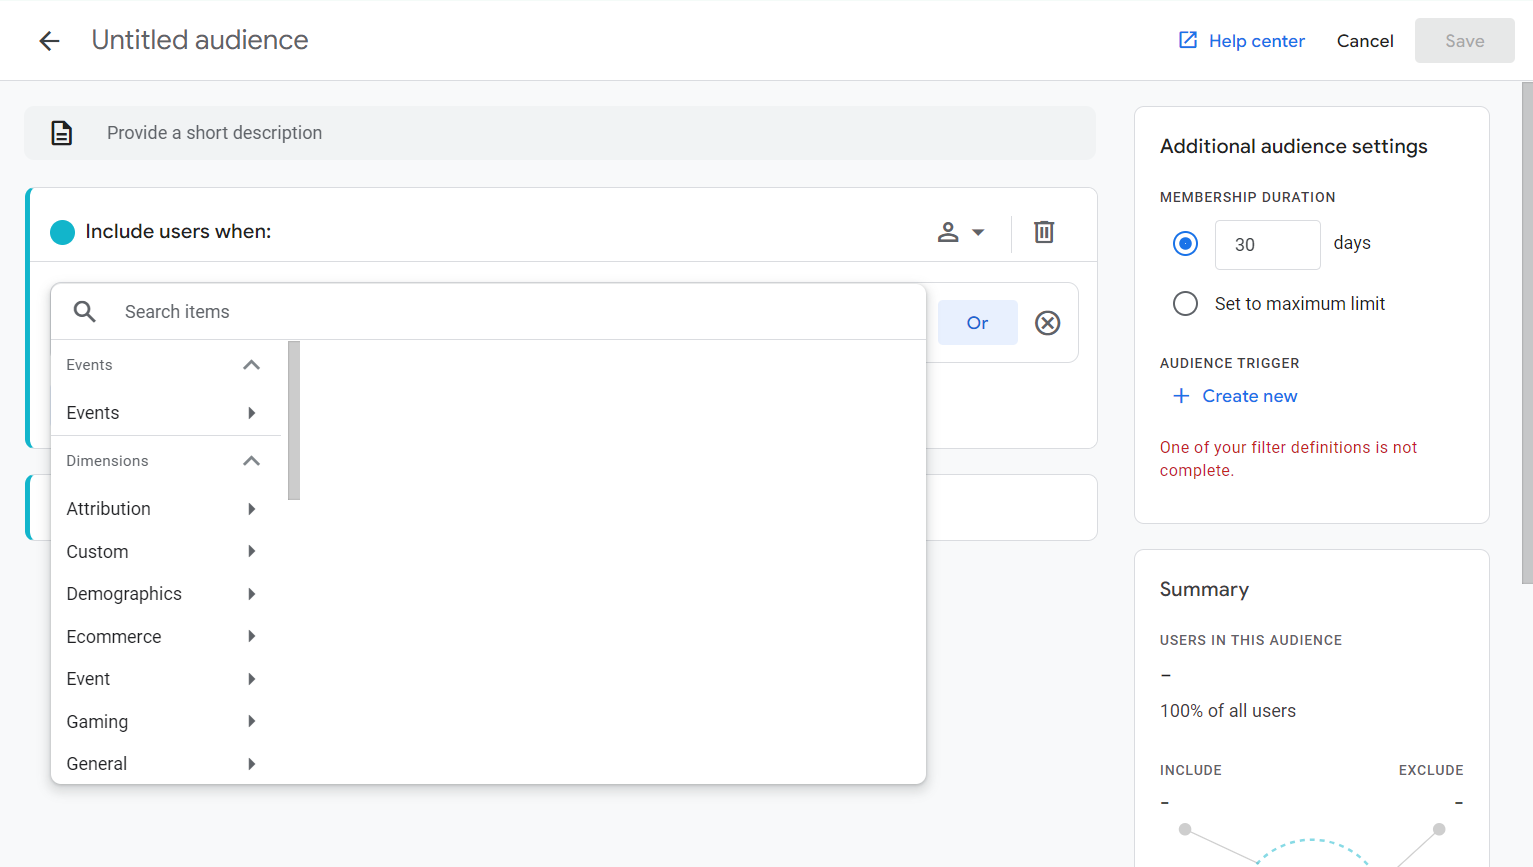
- Add group to exclude: You can also choose to exclude a group of users from the audience, based on specific conditions. For instance, if you want to create an audience of users who visited your product page but exclude users who have already purchased, you would set a condition to exclude users where the purchase event has occurred.
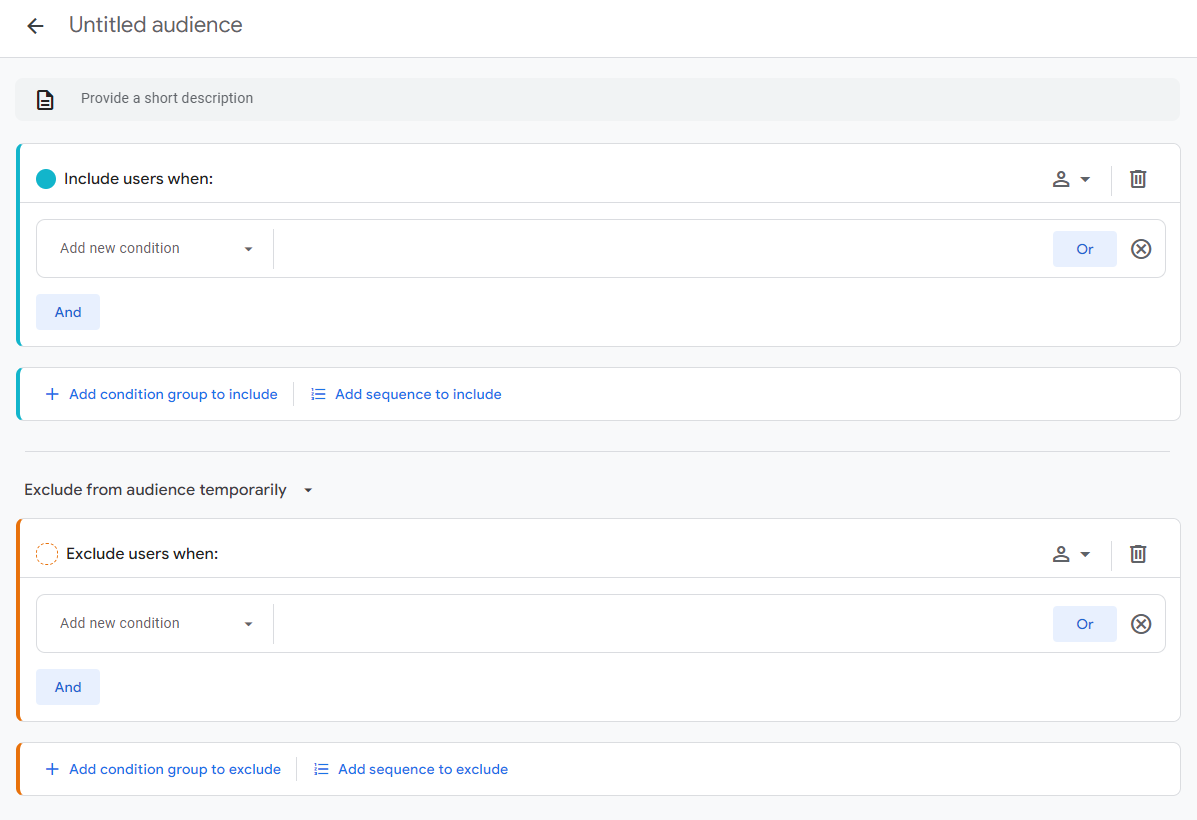
4. Add Membership Duration
- Membership Duration: Specifies how long users will remain in the audience after they meet the conditions.
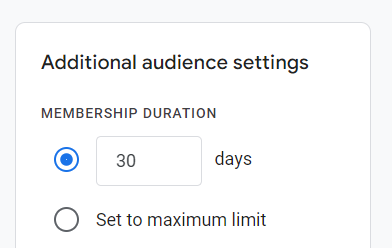
This is useful for targeting a specific timeframe. For example:
- 1 day: Users who met the criteria on that particular day.
- 30 days: Users who have met the conditions in the past 30 days will be included in this audience.
Choose the duration based on how relevant the audience should be. For instance, if you're targeting users who visited the product page in the last month but haven’t purchased, you might set this to 30 days.
5. Audience Triggers
- Audience Trigger – this option lets you create a trigger that activates when users meet specific audience conditions, allowing you to track and respond to their behavior. When a user falls into your audience segment, GA4 can log a new event, which you can then monitor separately in your reports.
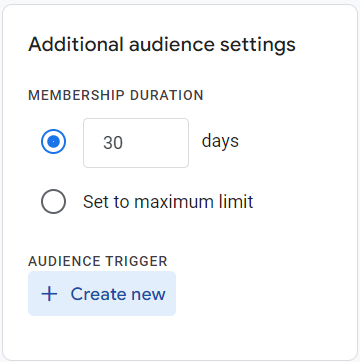
For instance, say you create a segment for users who added items to their cart but didn’t complete a purchase. You can set up an Audience Trigger to fire an event like “added-new-user-who-didnt-buy” as soon as someone meets these conditions. This event will appear in GA4, allowing you to monitor these users and track any future interactions they may have with your site.
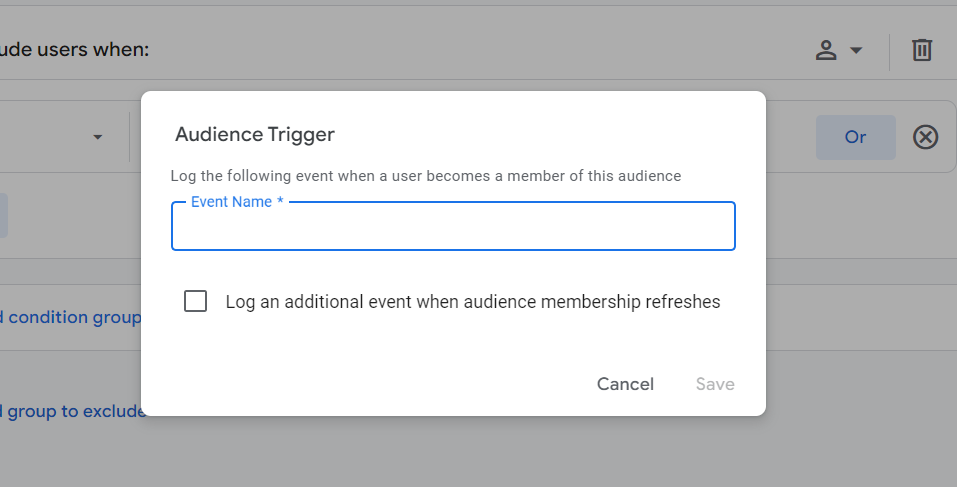
Audience Triggers are a great way to keep an eye on specific groups, helping you tailor your strategies based on user behavior patterns.
6. Save and Apply
- After selecting your conditions, audience duration, triggers, and exclusions, you can preview the audience to see how it aligns with your goals.
- Once satisfied, click Save to create your custom audience.
- This audience will now be available for reporting, segmentation, and targeting in other Google tools (like Google Ads).
How to Use Your Audience in GA4?
Now that your audience is created, you can use it in various ways:
- Reporting: Track how different audience segments are interacting with your website or app. You can compare audience performance in GA4’s Analysis Hub.
- Remarketing Campaigns: Use your audiences in Google Ads to deliver targeted ads to specific user groups, boosting your chances of driving conversions.


